HD Face Swap
An HD face swap here is the normal photo and video tool with its detail settings turned up: stills already swap on a 512 × 512 tile, and two switches add face restoration and a frame upscaler. Enhancement does not cost extra credits. It cannot invent detail your files never had.
- A clear, front-facing photo of one person
- Logos, landscapes and text screenshots will not work
Videos up to 300s (90s with enhancement on)
AI face swap examples
One clear face photo, one target photo, about ten seconds of processing. These are unedited results from the same engine you use above.
 Before
 After
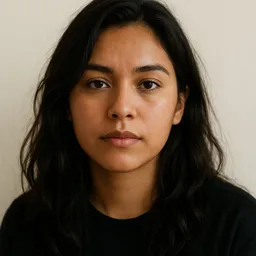
 Before
 After

 Before
 After
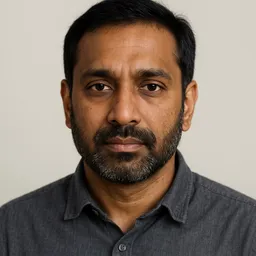
 Before
 After
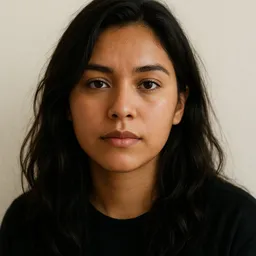
 Before
 After

 Before
 After
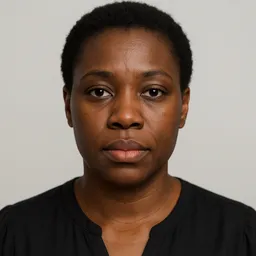
Every person in these examples is AI-generated and does not exist.
Most searches for an HD face swap come from a result that looked fine in a thumbnail and soft at full size. The swap model works on a small square crop of the face and pastes it back, so the blur usually comes from three places: the crop resolution, the restoration step after the swap, and how sharp the target was to begin with. This page explains which of those you can control on aideepfake.io and which you cannot.
The tool above is the same one used on every other page. Upload a source face and a target — a JPEG, PNG or WebP still, or an MP4, MOV or WebM clip up to 100 MB — then open the options. Enhance face detail sits next to the watermark switch. Pixel boost, the face enhancer model, the frame enhancer and the output scale live under Advanced options.
What this page will not promise: a fixed 4K or 8K output, a GIF target, a head or body swap, live video, or a batch queue. None of those exist here. A photo comes back at the size you uploaded unless you change Image scale, and scaling adds pixels, not detail.
What Actually Makes a Swap Look High Definition
Pixel boost: the swap tile size
The default swapper, hyperswap_1a_256, works on a 256 × 256 face crop. Pixel boost tiles that crop so the model swaps at 512, 768 or 1024 pixels instead of stretching a 256-pixel result. Photo jobs already start at 512 × 512. Raise it for a large face in a big still; it costs no credits, only processing time.
Enhance face detail: restoration after the swap
Turning on Enhance face detail runs a face restoration model over the swapped face. The default is CodeFormer at weight 0.9 and blend 50, tuned to stay close to the swapped identity instead of inventing a prettier, more generic face. Lower the blend if the result looks airbrushed.
Frame enhancer: the whole picture, not just the face
A soft target leaves a sharp face sitting on a blurry background, which reads as fake. The Frame enhancer (upscale) switch in Advanced options runs an upscaling model, span_kendata_x4 by default, over the full frame so the face and its surroundings match. It is slower than face enhancement.
Image scale and quality on the output
Under Output, Image quality defaults to 95 for stills, and Image scale resizes the saved file from 0.25× to 8×. Use scale when you need a bigger canvas for print or cropping. It does not recover pores or eyelashes the camera never captured, so pair it with the enhancers rather than using it alone.
More models after a purchase
Free accounts run the models the worker image keeps ready: CodeFormer for faces and span_kendata_x4 for frames. Any completed purchase unlocks the rest of the list, including GFPGAN, GPEN BFR up to 2048, RestoreFormer++ and the Real-ESRGAN family. The server enforces that rule before it charges.
How to Run an HD Face Swap
Start with the sharpest files you have
Use a front-facing source photo in even light where the face is at least a few hundred pixels wide. For the target, pick the original file, not a screenshot or a messaging-app copy that was already compressed. Every later step can only work with what is there.
Turn on Enhance face detail
Flip the switch in the options row before you generate. For a still that will be viewed large, also open Advanced options and set Pixel boost to 768 or 1024. If the target itself is soft, turn on Frame enhancer (upscale) as well.
Generate, then inspect at 100%
A photo swap costs 15 credits. A video costs 5 credits per started 10 seconds, with a 20-credit minimum. Enhancement does not change either price. Open the download at full size and check the eyes, teeth and jaw edge before you reach for more settings.
Video length limits tighten with detail settings, because every frame is processed again. Up to 300 seconds works with enhancement off and 90 seconds with face or frame enhancement on; a higher pixel boost lowers both caps further. A clip over the cap is rejected before any credit is charged.
When the Extra Detail Is Worth It
Enhancement is slower, and on video it shortens the clip you can submit. These are the jobs where it pays off.
A portrait you will crop or print
A headshot, a poster or a framed print is looked at closely. Use 1024 pixel boost, face enhancement and an Image scale above 1× if the target is small. Check the hairline and ears, where restoration models sometimes smudge.
A short clip for a large screen
For a 20–60 second clip that will play on a TV or projector, face enhancement keeps the mouth and teeth from smearing between frames. Leave pixel boost at the video default unless the clip is short, because a higher boost cuts the length cap.
An old or low-light target
Old scans, night photos and phone zooms are soft everywhere. Face enhancement alone produces a crisp face on a mushy background. Turn on the frame enhancer so the whole picture moves together, then lower its blend if grain disappears.
Thumbnails and social posts
Platforms recompress uploads, which eats fine detail first. Starting from a sharper swap leaves more after compression. Keep the label AI-edited on the post either way.
Developer jobs that need the same settings
The face swap API accepts the same faceEnhance and frameEnhance fields and the advanced options, including face_swapper_pixel_boost, so a pipeline can request the settings you tested by hand on this page.
Getting a Sharp Result Without Overprocessing
Fix the input before the settings
Resolution of the face matters more than file size. A face 300 pixels wide in the target gives the model room to rebuild eyes and teeth; a 60-pixel face in a wide group shot does not, however high the pixel boost. Crop or choose a closer target first.
Match light direction between the two photos. Enhancement sharpens whatever it receives, including a seam where a front-lit source meets a side-lit target. If the jaw edge shows, raise Mask blur slightly instead of adding more enhancement.
Signs you turned it up too far
Plastic skin, glassy eyes and a face that looks younger than the target are restoration artifacts. Lower Face enhancer blend toward 30–40, or switch the enhancer off and rely on pixel boost alone.
On video, flicker between frames usually means the detector is losing the face, not that you need more detail. Check the clip for fast head turns or hands crossing the face before raising any HD setting.
What HD does not change
Formats stay the same: GIF, HEIC and AVIF are rejected. One source face replaces the faces the tool selects; there is no per-face mapping, head swap, body swap, live mode or batch upload on any plan.
Enhancement also leaves the watermark rule alone: the mark comes off only after a completed purchase. And it does not change what a job costs or how long a finished file is kept; those rules are the same on every page that mounts this tool.
Check Your HD Result
Zoom to 100% and look at the places restoration struggles first: the hairline, the edge of the jaw, teeth and the whites of the eyes. A sharp face with a visible outline is a mask problem, not a resolution problem.
Compare the swapped face with the rest of the frame. If the face is far crisper than the shirt or background next to it, turn on the frame enhancer or lower the face enhancer blend so the two match.
- The source face is sharp, front-lit and not a compressed screenshot
- Enhance face detail is on, and pixel boost suits the face size
- The frame enhancer is on if the target itself was soft
- Skin texture still looks like skin, not plastic
- The video is within the enhanced length cap
- A published swap is labelled as AI-edited
Sharper Swaps Need Clearer Labels
The more realistic the output, the easier it is to mistake for a camera original. Article 50(4) of the EU AI Act asks whoever publishes a deepfake to disclose that it is synthetic. Label HD swaps you post, and keep the source files.
Use your own face, a person who agreed, or a synthetic character. Sexual, harassing and non-consensual uses are banned whatever the resolution, and reports are acted on.
HD Face Swap FAQ
Does enhancement cost more credits?
No. A photo swap is 15 credits and a video is 5 credits per started 10 seconds, minimum 20, whether face enhancement, the frame enhancer or a higher pixel boost is on or off. The cost is time: enhanced video is capped at 90 seconds instead of 300.
Can I get a 4K or 8K face swap?
There is no fixed 4K or 8K output mode. Output keeps the size of the file you upload unless you change Image scale or Video scale, and scaling resizes the file rather than adding real detail. Upload a sharp, high-resolution target if you need a large result.
What is pixel boost?
It is the resolution the swap model works at on the face crop. The default model is trained at 256 × 256; pixel boost splits the crop into tiles so it can swap at 512, 768 or 1024. Photos start at 512 × 512. Higher boost on video shortens the length you can submit.
Should I use face enhancement or the frame enhancer?
Face enhancement restores the swapped face only. The frame enhancer runs an upscaling model over the whole picture. Use the first for almost every job; add the second when the target is soft overall, so the face does not look pasted onto a blurry scene.
Is HD face swap free?
Free and daily check-in credits can run every setting on this page with the default models. A completed purchase unlocks extra enhancer models and the watermark switch; it does not raise the format or length limits.
Why does my enhanced swap look airbrushed?
The restoration model is averaging the face toward a generic one. Lower Face enhancer blend, keep CodeFormer at a high weight so it stays faithful, or turn enhancement off and rely on pixel boost.
Related Tools
The same engine for a still, a clip or an API job, plus the guides and plans that affect output quality.
Run a Sharper Swap
Turn on Enhance face detail, set pixel boost for the face size, and generate. The credit price is the same as a standard swap.
Open the face swap tool